(with videos)
Updated: 2025-11-11
Open link in web browser, Don’t open in WeChat
Technical support is provided as a courtesy and is not included in your subscription.
Before contacting support, please visit the App Guide or FAQ for quick solutions.
Step 01 – Download
Supported Devices: (Checked on 2025-10-01)
iPhone – iOS 15 or above (use ShadowRocket, Hiddify or sing-box for older version)
Android – ver. 13 or above (use Clash Meta, Hiddify, or sing-box for older version)
| Software Version | Clash Mi v1.0.12 |
|---|---|
| Official Website | Official Website | GitHub |
| iOS / iPhone | AppStore Link | or search “Clash Mi” on AppStore |
| Android (arm) | Direct Download |
| Windows | N/A |
| MacOS / Linux | N/A |
Step 02 – Install
iOS / iPhone
iOS (install) → (click to open)
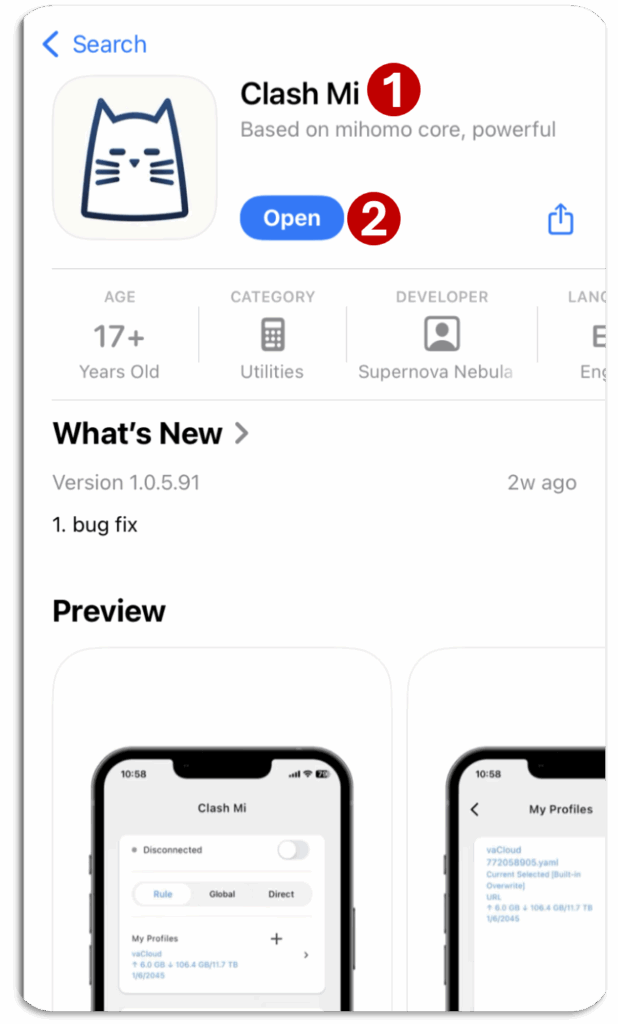
iOS – Install
1 Search “Clash Mi” on AppStore
2 Install & Open
If “Clash Mi” is not available on AppStore, Login with non-Chinese Apple ID.
Android
Method 01 – Android PlayStore → Not Available
Method 02 – Android (install APK) → (click to open)
Android – Download APK
Download the .apk file from Download – Links section.
Android – Install
1 Open the File Browser App of your phone
File Browser App Names:
Files, My Files, File Browser, etc.
2 Go to “Download” folder in your storage & find “Clash Mi” file.
3 Click to open
4 Click “Install”
Method 03 – Android (install via WeChat file) → (click to open)
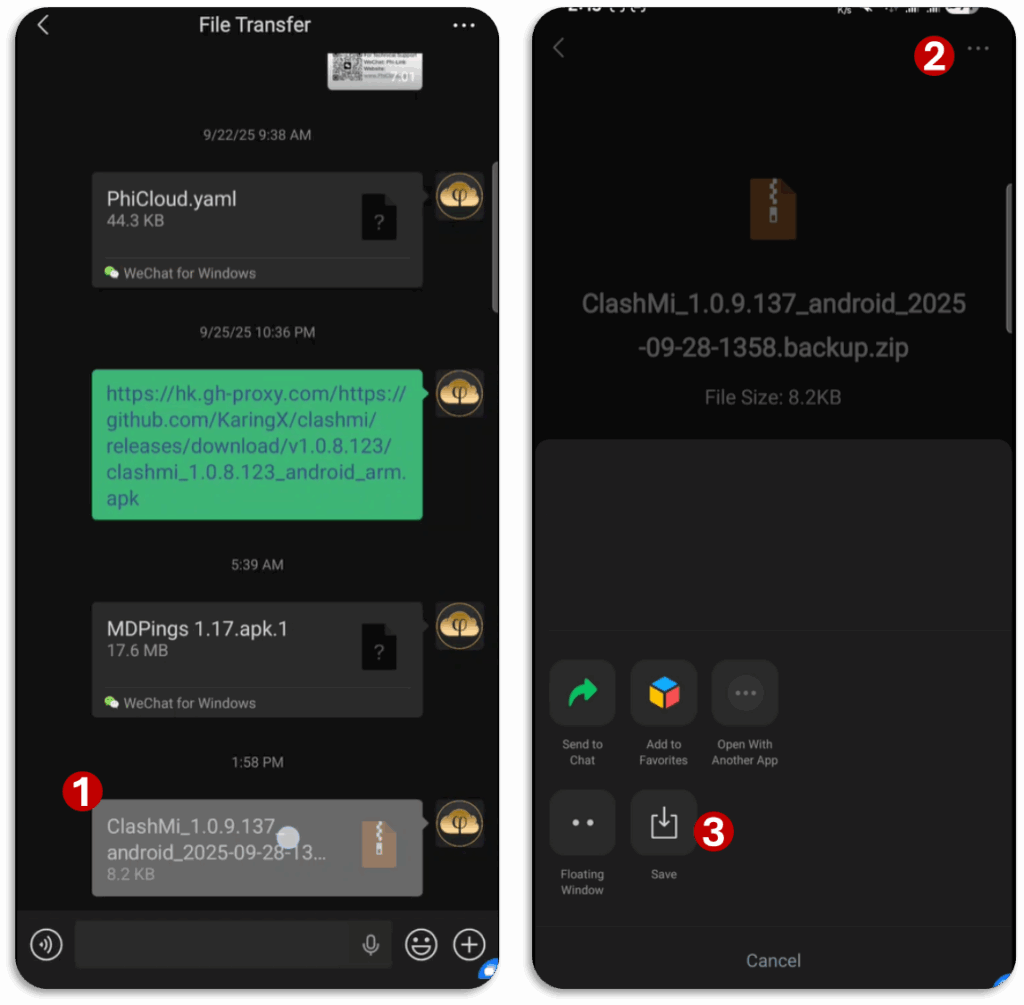
Android – Save APK file from WeChat
Open Clash Mi file sent on WeChat
Click on three dots
Click save on Device
Android – Install
1 Open the File Browser App of your phone
File Browser App Names:
Files, My Files, File Browser, etc.
2 Go to Storage > Download >WeChat folder in your phone storage
& find “Clash Mi” file.
3 rename file and remove “.1” at the end
4 Click to open
5 Click “Install”
Step 03 – Basic Settings
N/A
Step 04 – Import Profile & Connect
Method 01 – Import Subscription Link
4.1.1 Import Profile → (click to open)
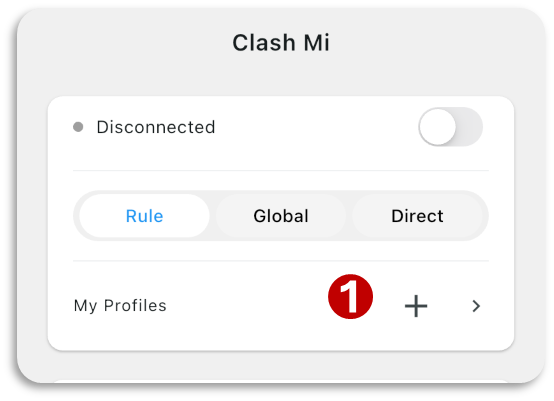
Import Profile – Process
Do not Update Profile with this method.
Use any Wi-Fi 🛜 (not mobile hotspot) to import first time.
0 Copy YOUR SUBSCRIPTION LINK
1 Click on + icon
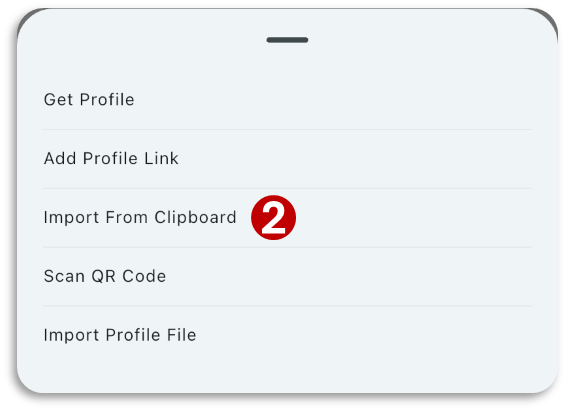
2 Click “Import From Clipboard”
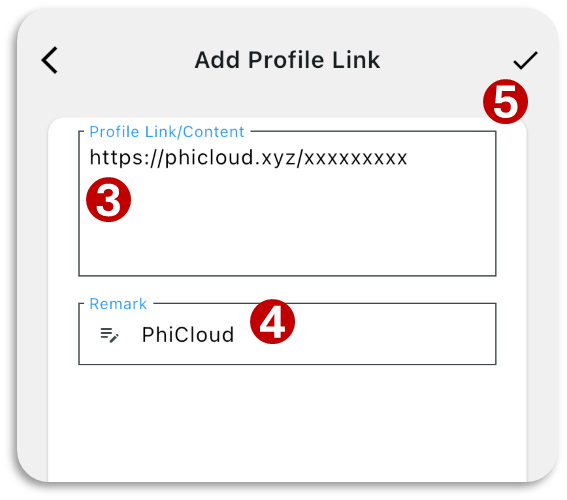
3 Profile link will be automatically pasted.
4 Write “PhiCloud”
5 Click ✔️
Wait for Profile Added successfully Message
Method 02 – Import Backup
use this method, if there is an error importing subscription link
➤ 4.2.1 Get ClashMi-Backup.zip file from admin
4.2.2 Android – Save backup File on phone → (click to open)

1 Open the backup file
2 Click on ••• (three dots)
3 Click save
file will be save in “Phone Storage > Download > WeChat“
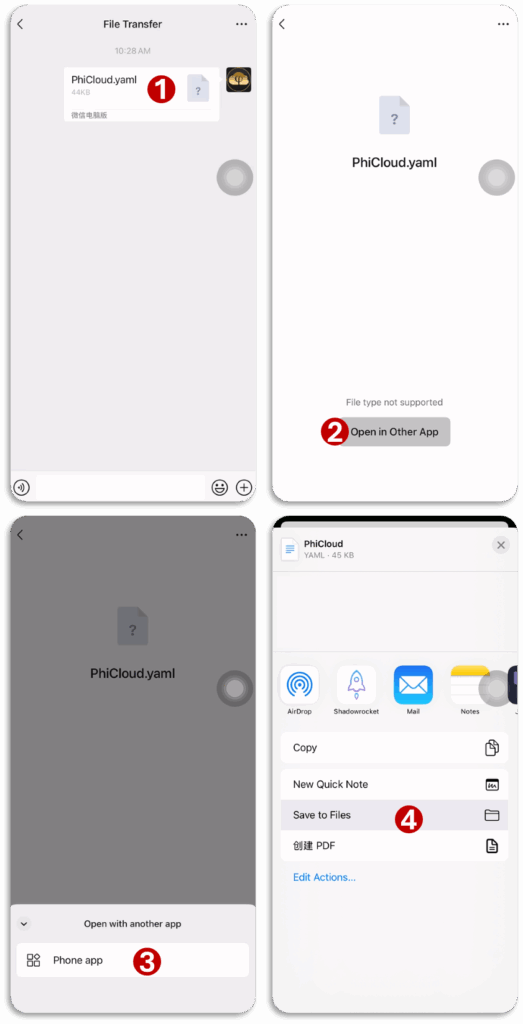
4.2.2 iOS/iPhone – Save backup File on phone → (click to open)

1 Open the backup file
2 Click “Open in Other App”
3 Click “Phone app”
4 Click “Save to Files”
select where you want to save the file
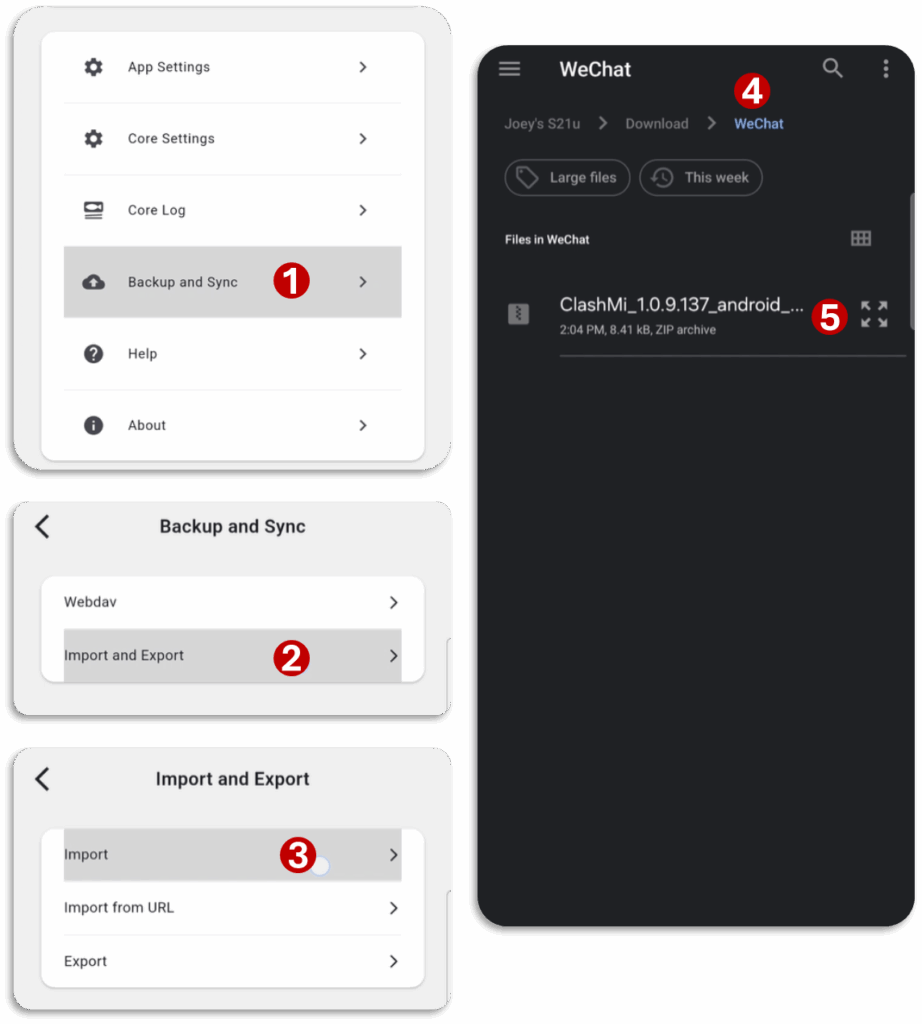
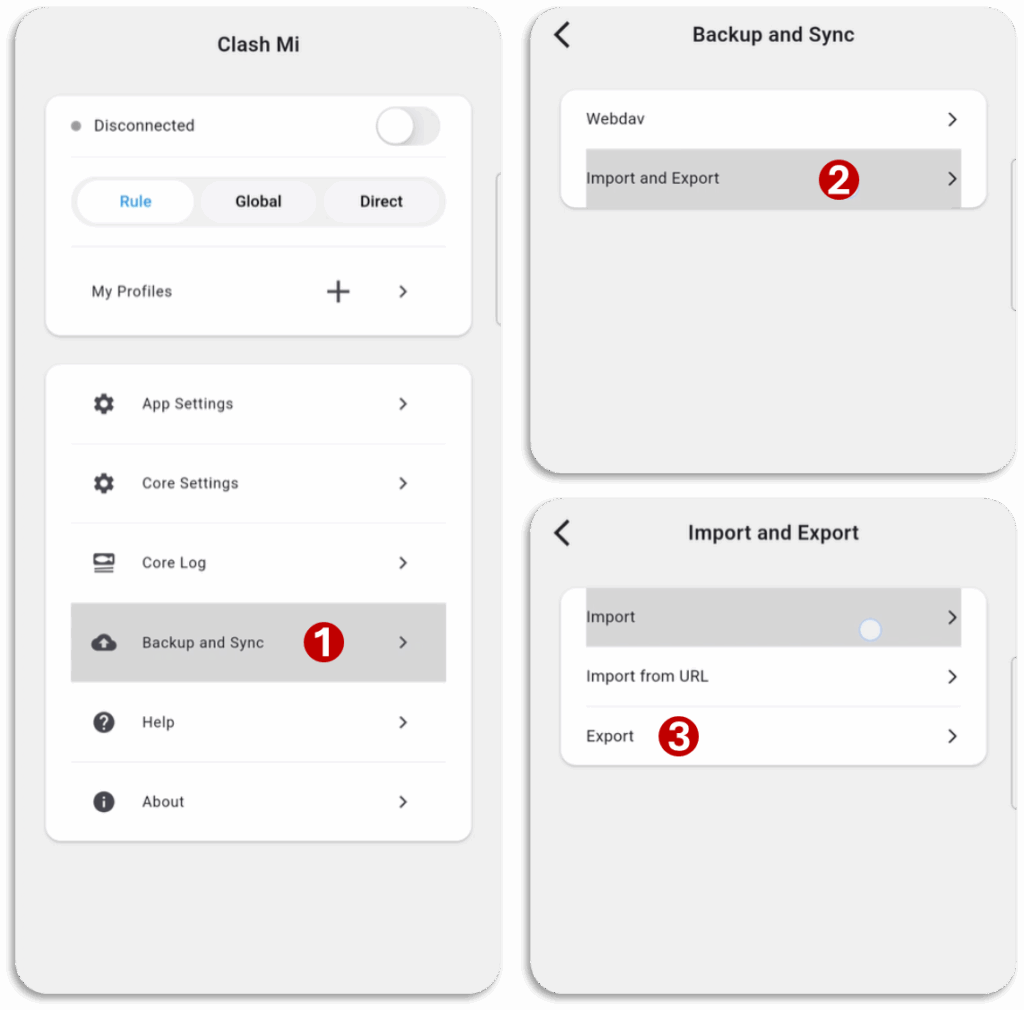
4.2.3 Import Backup → (click to open)
1 Open “Backup and Sync” in Clash Mi
2 Click “Import and Export”
3 Click “Import”
4 Goto
Android -> Phone Storage > Download > WeChat
iOS/iPhone -> where you saved the file
5 Select the downloaded file
Note: Recommended to Refresh servers
(Proxy tab > ⚡) after importing first time.
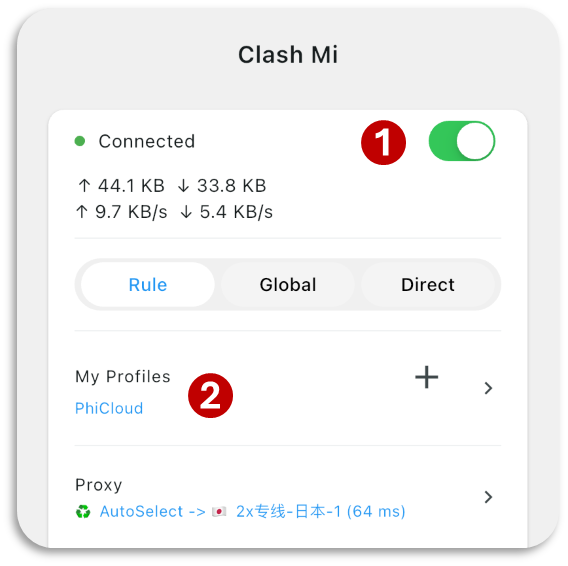
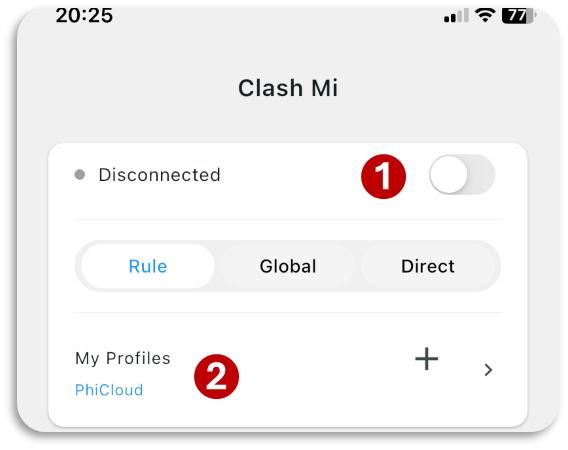
Connect
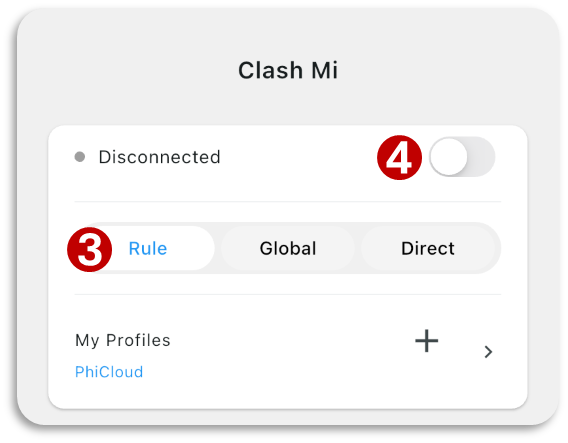
4.1.2 Connect Profile → (click to open)
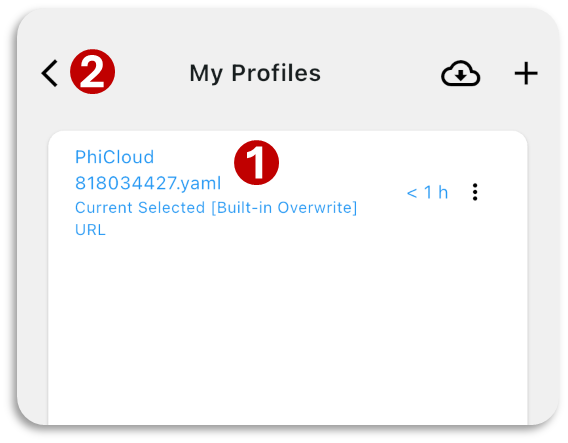
Connect – Process
1 Click on the profile to select (blue colored).
2 Click く to go back to home
3 Make sure Rule is selected
4 Enable to get connected
5 Click “Allow” or “Ok”
(only shows when while connecting first time)
Step 05 – Refresh Servers
Refresh Servers → (click to open)
1 Connect
2 Open “Proxy” tab
3 Click on ⚡icon to refresh servers
If the profile is imported first time, must refresh servers.
Guide – Basic Knowledge
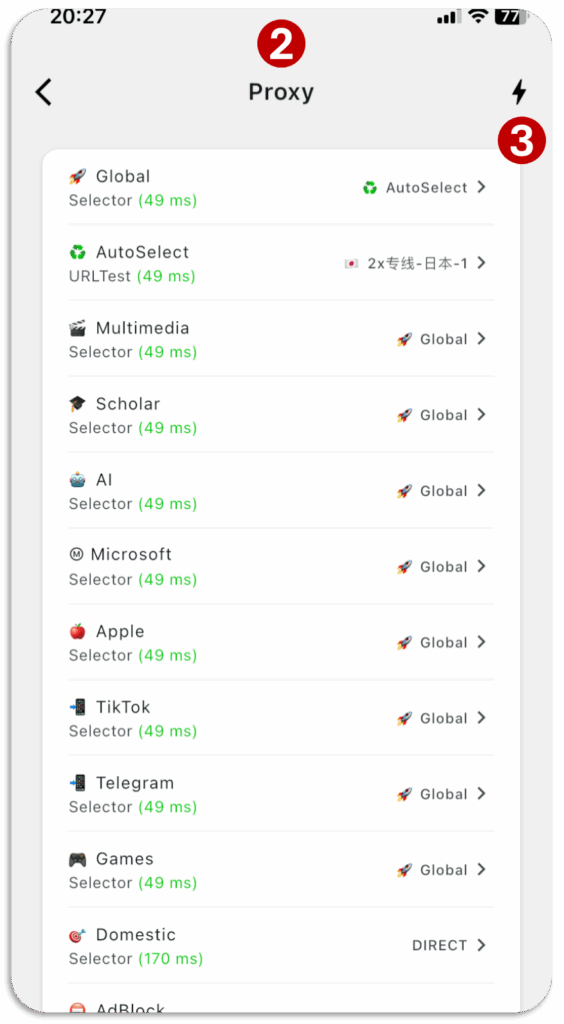
Change Server → (click to open)
1 Connect & Open “Proxy” tab
2 Click on ⚡ to refresh servers (Optional)
3 Open “🚀Global” Group
4 Select server.
Notes:
– Use ♻️AutoSelect for optimized experience.
– Numbers only show online status.
– ChatGPT/Netflix/TikTok are not available in some countries (available countries US, JP, SG, etc.).
– Manually selected server will be kept selected unless changed back to ♻️AutoSelect or 🚀Global.
Update Profile → (click to open)
1 Connect/Enable Clash Mi
2 Open “My Profile”
3 Click on ![]() to update profile.
to update profile.
Don’t keep pressing ![]() repeatedly. Wait for updating ⟳ to stop .
repeatedly. Wait for updating ⟳ to stop .
4 Re-connect (Disable and enable again)

Update Profile – CAN’T UPDATE PROBLEM → (click to open)
Use this method if:
Unable to Connect or All Servers show timeout
Connect with any Wi-Fi 🛜 (not mobile hotspot) to update.
1 Disconnect/Disable Clash Mi
2 Open “My Profile”
3 Click on ![]() to update profile.
to update profile.
Don’t keep pressing ![]() repeatedly. Wait for updating ⟳ to stop .
repeatedly. Wait for updating ⟳ to stop .
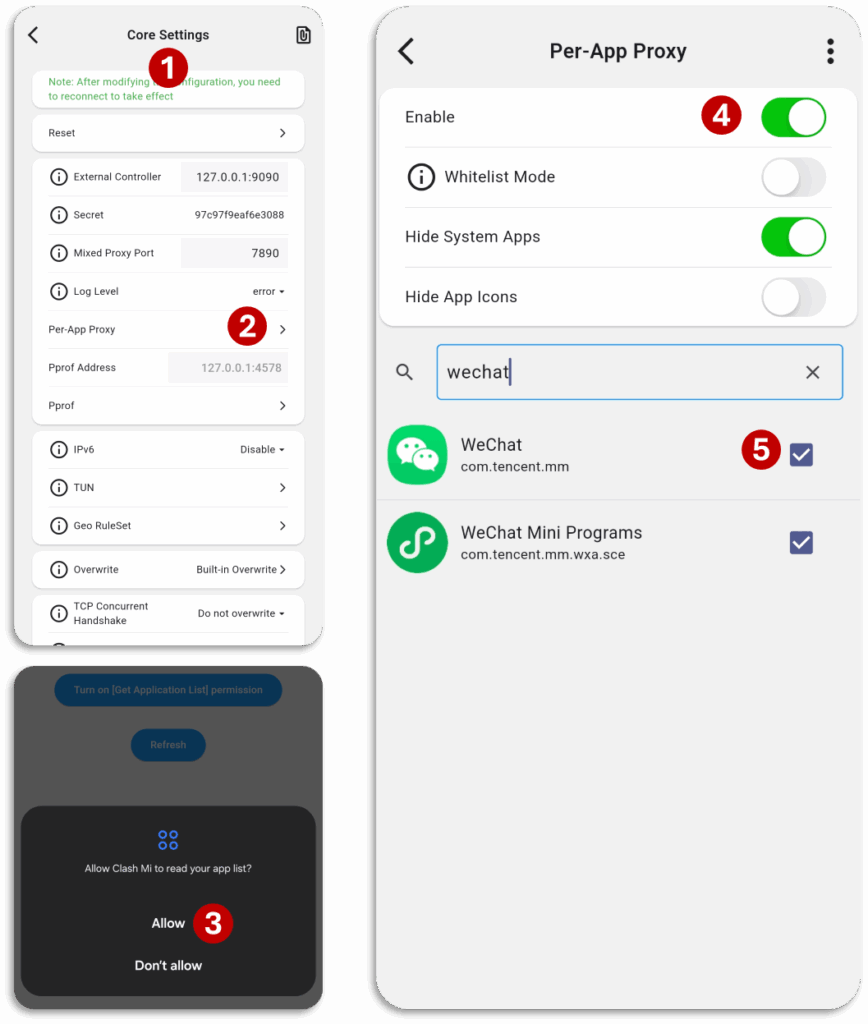
Per-App Proxy – Android Only → (click to open)
1 Open “Core Settings”
2 Open “Per App Proxy”
3 Click “Allow”
4 Enable “Per-App Proxy”
5 Selected Apps will not use proxy/servers.
Export Backup → (click to open)
1 Open “Backup and Sync” in Clash Mi
2 Click “Import and Export”
3 Click “Export” and Save your file
Troubleshooting
Before contacting support, check this to solve your problem.
Server Selection (Obsolete)
Notes
Notes:
1 Use ♻️AutoSelect for optimized experience.
2 Numbers only show online status.
3 Manually selected server will be kept selected unless changed back to ♻️AutoSelect or 🚀Global.
Change Groups Server → (click to open)
1 Connect & Open “Proxy” tab
2 Click on ⚡ to refresh servers (Optional)
3 Open you desired group
4 Select servers accordingly
♻️AutoSelect – Recommended
Country Groups – only connect with one country
Single Server – only connect with one server
Notes:
– Manually selected server/proxy will be kept selected unless changed back to 🚀Global”.
– ChatGPT/Netflix/TikTok are not available in some countries (available countries US, JP, SG, etc.).
Servers Optimized Settings → (click to open)
Use the following server settings for Optimized Experience.

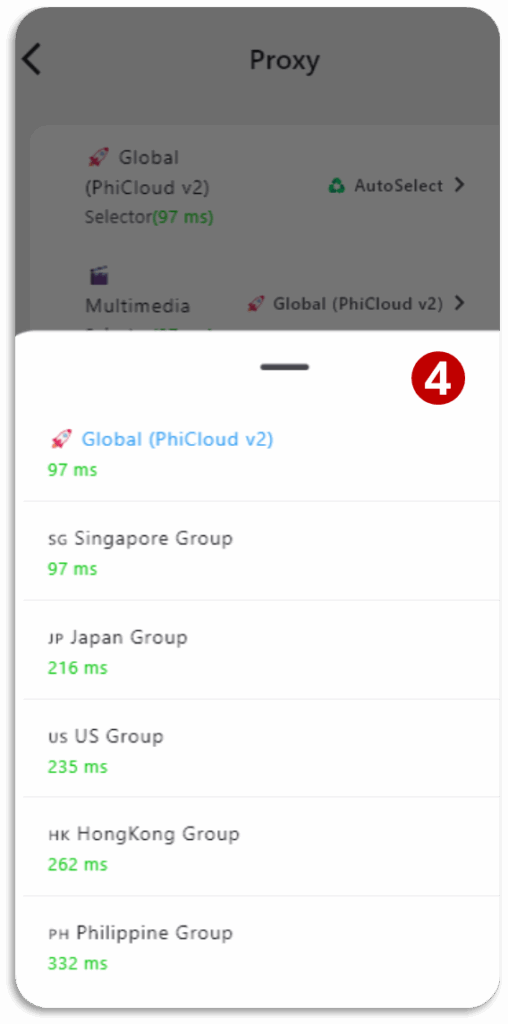
Example – Change to PH server in 🚀Global Group (video) → (click to open)
1 Go to “Proxy” tab
2 Open 🚀Global group
3 Change the server
Note: This is only example, change as per your requirements. if having problem after changing the server in the group, change back to 🚀Global.
Example – 📲TikTok Group use Philippine server (video) → (click to open)
1 Go to “Proxy” tab
2 Open desired group
3 Change the server
Note: This is only example, change as per your requirements. if having problem after changing the server in the group, change back to 🚀Global.
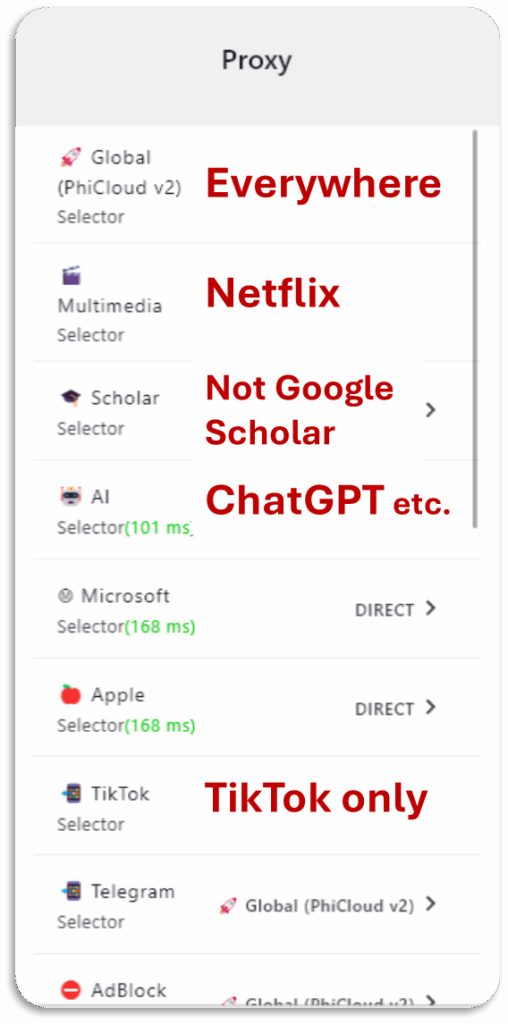
🚀 Global Group – Details → (click to open)
🚀 Global Group – This will select server for everything unless you change settings in other groups.
| Group | Details | Server |
| ♻️ AutoSelect | Automated best server selection. (Preferred for best experience) | |
| Country Groups | Only connect with specific country (Direct means, not available) | |
| Single Server | Everything connect with only selected server | |
| Direct | Traffic without server |
Other Groups – Details → (click to open)
Each group will change Proxy servers for specific websites.
| Group | Details | Server |
| ♻️ AutoSelect | Automated best server selection. | Don’t change (Auto test every 5 mins) |
| Ⓜ️ Microsoft | Microsoft services, OneDrive, etc. | Default: Direct |
| 🍎 Apple | Apple services | Default: Direct |
| 🤖 AI | ChatGPT, Gemini, etc. | US,HK, JP, SG, etc. (US is Preferred) |
| 🎓 Scholar | Other than Google Scholar | US,HK, JP, SG, etc. (US is Preferred) |
| 🎬 Netflix | Netflix |